Blue Mosque: First Wash

Blue Mosque First Wash

Just as an interim, and whilst I think of it, I have masked out several items on this picture before putting down a base wash

The scene was brightly lit from the left and there is interesting sparkle on the trees, on the tiny background figures and on the mosque itself. Whether or not I will be successful in capturing these remains to be seen. I have always found them elusive and welcome any tips.

I have masked along the left-hand edge of the minarets so as to get a hard edge against the blue sky. Likewise some of the domes and the sides of the tree trunks. The colour of the palm tree trunks is brown going towards red in the bright light, so will probably mix some permanent rose in with the burnt sienna, hopefully to catch that richness of colour. Also the park benches are that colour too.

I have put a band of Indian yellow wet-in-wet where the flower beds are so hope that works

The rest is detailing and building up the darks to encourage the brightness of the brights. We shall see. This may well take me a while

Blue Mosque, Istanbul:Tonal Sketch

Blue Mosque Sketch

I mentioned a few posts back that I wanted a smaller picture for the exhibition as they are popular sometimes. I will repeat the photograph later, which was one that I took when we were there in October

The light was very good and the shadows were long and distinct. I couldn’t make my mind up, whether to use the local colours or whether to try a sunset picture. I think as the shadows are good that I will stick with the local colours, with maybe a mental note to do a sunset picture another time. As we were driving from the airport to pick up our ship,the day before,  the sun was setting over Istanbul, and especially over the Mosque of Suleiman the Magnificent, another beautiful building.  The sky was orange going towards pink and the buildings were violet. Sadly my camera was still packed in the luggage hold. Maybe I will try that shot from memory one day.

I think the sketch will be very helpful. I have moved some trees away from the front of the building, and I think I have sorted out the shaded areas. I didn’t use ink this time for the sketch. Instead I used Paynes Grey watercolour, which I quite like for sketching. You can’t tell from the photograph, but the colour is a blue-black shade, which is quite pleasing. I sometimes think that I prefer the sketch to the finished painting. There is something about a sketch, perhaps because it is done quickly and without inhibition, that the work retains spontaneity and freshness. Easy to lose this, when working carefully on the actual painting.

I now have to transfer the sketch to the watercolour paper, which is the uninteresting part and then start the painting. Colours to be decided, so I will be a little while

DSCF2491

As you can see, some unnecessary stuff left out, and I have moved closer to the building itself

I am hoping on Saturday to get up to London and go to another exhibition at the Tate Gallery. The exhibition is entitled Art and Empire which should be interesting. When we were there for the Frank Auerbach exhibition, we looked in quickly, but this is quite a big exhibition so we left it for another day. If it is good I will write something about it. Certainly it will be as different to the Auerbach collection as chalk is to cheese

Textured Finishes in Watercolour:Rust

DSCF2814

A while back now, I touched on the subject of accurately representing texture in watercolour. The particular texture that I mentioned was rust, and the patina of aged metal

The little study above, I did some time ago, and I followed an instruction from a reference book called  “Painting Country Gardens in watercolour, pen and ink “. This was written by Claudia Nice. This little painting was done in watercolour only, so no ink was used. I have had this book for some time now, and have found several of the techniques in it to be very useful indeed.

The rusty barrow does look very convincing, and is achieved through a straightforward glazing exercise. That is to say, one coat on top of another that has been allowed to dry rock hard. This is how she tells us to do it, with the following wash glazes in this order.

  1. Burnt Sienna (base coat)
  2. Cadmium Orange
  3. Either red muted with green or red violet muted with yellow green. I seem to remember using the first one
  4. Final glaze of Violet with Payne’s Grey

I must repeat that it is imperative that you allow each coat to dry rock hard. I usually leave each coat to dry overnight as I prefer natural drying. Some people speed the operation up with a hairdryer which is fine, unless the paper has cockled, in which case it won’t dry flat

With a damp brush, and there are specialist brushes on the market for this, but if you don’t have one, no worries as one of your detail brushes will do fine, just lift out highlights or sheen areas. If you are careful you can also use razor scrape on very dry paint, of course. Next image is a close up to give you a better idea

DSCF2815

Not done as well as the Claudia Nice version but I hope that gives you some idea

Her picture had the barrow full of flowers, hence the garden theme. I was only interested in the metal finish at the time

I hope you find that helpful. Every now and then, I stress that I am not an art teacher, just a painter whom you can follow if you want


Langstone Mill Reworked

Langstone Mill Reworked

Once again, the colours are deeper in the actual painting, but this is the reworked version, which, I believe, to be a great improvement on the first version. But, of course, that is my opinion

I have deepened the shadows enormously, which exaggerates the light coming from the right-hand side. The effect, I feel, is much more dramatic.

In the water, I have introduced more of the orange brick colour to look like reflections. Also I have added some current swirls and some flecks of white to look like movement in the sea.

The red posts and flag have been refreshed with Cadmium Red. I think they come forward now, which is good, and take the eye towards the mill

More seagulls add some life, plus too some distant rooks over the tall trees. The birds are spooked by that bad weather coming in from the background!

I keep looking from the screen to the painting. The colours are richer in the painting, of that there is no doubt, but little more that I can do about it

Time soon to move back to Istanbul, and work on that small painting of the Blue Mosque which will be fun to do, I think

Reworking Langstone Mill Painting

Langstone Harbour & Mill

Just to put the picture up again. The more I looked at this painting, the more dissatisfied I became

I think that I said before that the camera has leeched colour from the image, and that is true. Nevertheless, I feel that the painting looks anaemic ( I checked the spelling and I am correct, even though the spellcheck doesn’t agree). This was supposed to look dramatic with the wild sky etc, but just doesn’t work in my opinion

I consulted my mentor at the art club, and she has given me a list of suggestions, so I shall be working on this next, hopefully not too long, trying to get some feeling into the picture

After that, I want to get back to Istanbul. I need a smaller painting, and I think the Blue Mosque will lend itself to that, as this image

DSCF2491

I may have to remove a tree or perhaps not. This will make a nice little study. So plenty to get on with!

Snow Painting Completed

St.Nicholas Church, Pyrford, Surrey

St.Nicholas Church, Pyrford, in Surrey

This is the finished painting of the church to start with, and I will put up one of the stage paintings next, which deals with the masking out and the sky. The sky is probably the trickiest part of the operation as this is done wet-on-wet, and needs some handling, and I will talk about that with the next image

For the trees and bushes I used a fan brush loaded with two  colours at once, ultramarine blue and burnt sienna. These mixed on the paper giving a nice brown/grey or didn’t mix and gave the two colours in the tree which is fine too. Just needed to add some branches with a detail brush

Masking and sky

Masking and sky

I was asked where I would put the masking fluid in this picture. Well, along the snow line on the church roof, as when I come to put the sky in next, there will be quite a lot of water sloshing about, and it will be difficult to keep the blue colour off the virgin snow. Having said that, I have drawn the snow line down the roof line, as though it is thawing slowly, and that is just me, as I think it looks more interesting like that.

Also on the roofs of the house in the background, plus window ledges, grave stones and buttresses. Anywhere you think snow will cling

The sky is a subject in itself. I wanted to have a sky with movement in, and to look cold even though the sun was shining. That was the intention. I have a method which I have evolved and which I prefer, although obviously there are different ways of tackling this

Firstly I wet the area thoroughly with a large brush with clean water, so the paint can move around quickly. Next I brush on cobalt blue mid strength, and then pat out some cloud shapes with paper towel. Whilst the paper is still glistening, and that is very important otherwise the paint will not move, pump in ultramarine blue pigment, where you think you will want to see blue sky. I suggest not too much

I should have said at the beginning, make sure that your board is loose from the easel, as you are now going to pick it up and you won’t have a lot of time. Hold the board vertically and watch the ultramarine blue bleed downwards, and then turn the board on 90 degrees and watch the pigment bleed again this time across the sky, if that makes sense. You will have to decide when you think you have the right effect, and of course the colour will dry lighter than it is now

Put the board back on the easel. Phew!

Let this dry rock hard. I leave it overnight usually. What you should end up with is a swirling sky because with all this water swirling around that is the effect you should get. The cobalt blue will become dark cloud, and where you have blotted out will be the white tops of the clouds. The ultramarine will be the sky showing through

Obviously, when you are doing this, water will run down onto your snow. Just be ready with paper towel to mop that quickly and you should be ok

Apart from the sky, these are simple little paintings to do, yet effective in their simplicity. Hope you liked this

My Workspace

My Workspace

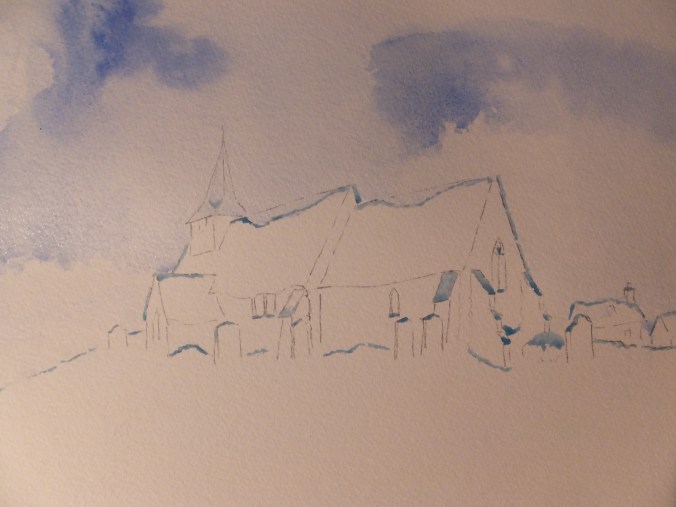
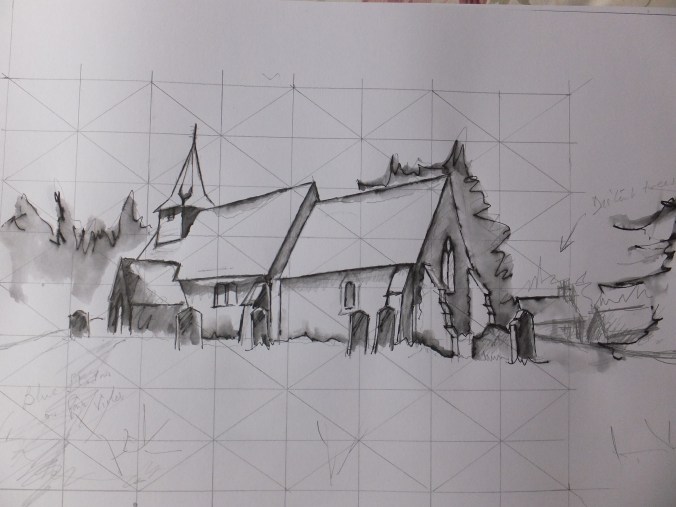
I have been asked on a couple of occasions to show my work space. As I am still working on the snow scene, this seems like a good opportunity.

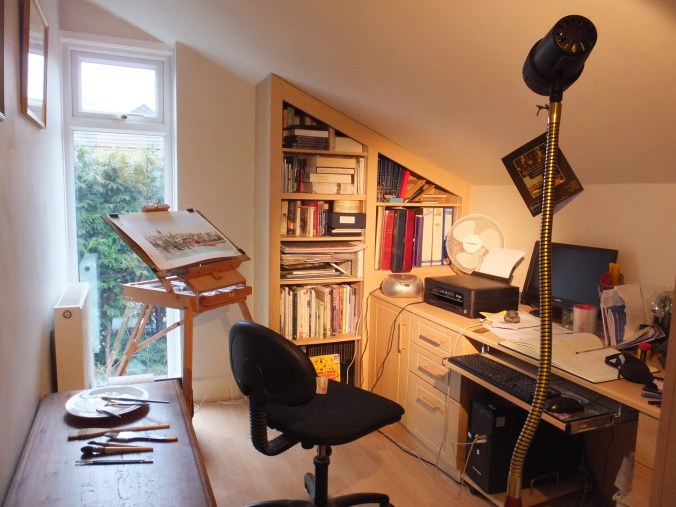
As you can see, it is rather cramped. We live in a Victorian cottage, built 1889, which is charming but not intended for 21st century living. There is an extension on the back, built around 1980, but that extended the ground floor only, so the kitchen is a good size which is the main thing, but sometimes could do with more space upstairs. But it is enough

This is really the third bedroom which we don’t need so converted to an office. Computer, books and files are all here, and  I also paint here. I recommend an easel with a drawer, so that you can get the colours you need, ready to use. Nothing worse than rummaging through boxes looking for a colour with the paint drying on the paper.

I am rather particular when it comes to lighting too. I buy from a company called Serious Readers who specialise in lighting for people who do close work, and also for people with less than perfect sight. Some of their lights emulate daylight. The light that I use is brilliant but warm, which I prefer to daylight. As you can see, my window space is small and faces north. My neighbour’s hedge does not help!! The bulbs are low-energy despite their brilliance, and long-lasting, 25,000 hours as I remember. Mine is floor-standing but they do table models. Their web site http://www.seriousreaders.com will tell you anything you need to know

You can just about make out where I have laid out my favourite brushes on the side, and also my old white dinner plate which I use for mixing and which I prefer to a pallette. Brushes that I use all the time are the large hake for overall washes,and  a range of squirrel brushes which are a joy to use, as they hold so much water that you can paint on and on. Also they will come to a point despite their size, so you can use them for detailing too. I do also have a couple of detail brushes as well, and a square edged brush for straight lines

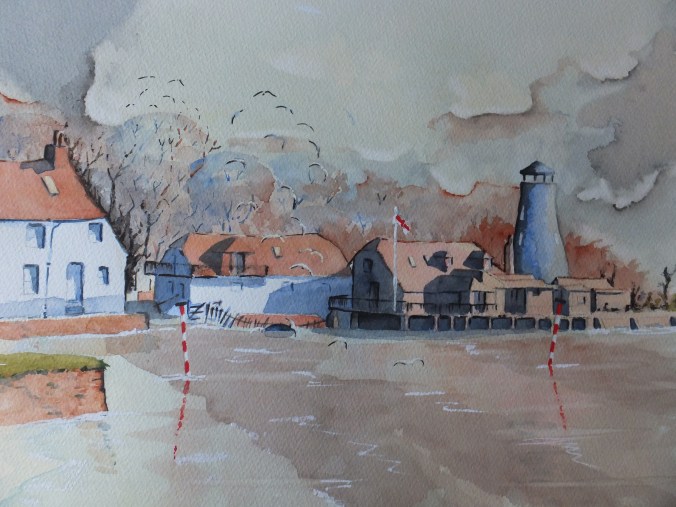
I don’t tend to go in for very fine detailing even with architecture, probably because I can’t but do admire people who can. My excuse is, that I have a tremor in my hands which is not to worry about, just a nuisance. I think it must be genetic, as my father who is close to 100 years old, writes like a lie detector, so that will be me trying to paint one day, I guess. Perhaps I will do Jackson Pollock look-a-likes insteadSome of my reference books

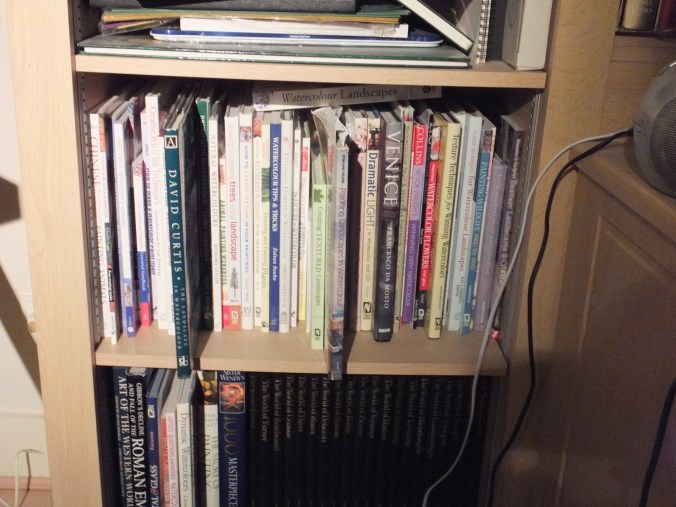
Just some of my reference books.

These books are like recipe books for artists, and just as well thumbed. Many of them are American, really excellent, from whom I have learned a lot, and maybe I will do a post on one or two in the future. Some of their methods are really interesting, especially when portraying texture in watercolour. Next are my favourite two authors, both British, coming up.Two favourite authors

David Curtis produces mouth-watering watercolours in gentle, gentle colours that somehow lift off the page. I can never get anywhere near his work. The other painter, whose work I often refer back too is, Rowland Hilder, now sadly deceased. He is known for winter landscape, especially in his native Kent, in south-east England. The landscape is fairly flat there, so big threatening skies are a speciality of his, some of which I have attempted, sometimes successfully I am pleased to say. He also did a lot of seascape especially around the Thames estuary, as he was also a sailor, and spent a lot of time in and around east-coast harbours

That pretty well completes my article on my work space. If anything I suppose, it does show that you can work in a confined space with just the basic tools. If you need to know anything else about equipment, if I can help then I will

Snow Painting: the Working Sketch

Snow Painting Sketch

This is my sketch, done fairly quickly, which, I think will give me some sense of direction. I need to use the photograph less now and my sketch more

The snow will be denoted by the paper that I shall leave white. There will be some masking out to be done, and as I don’t have a photographic reference for the snow, I shall have to be thorough in planning where the snow would lie. One thing that masking fluid is good for, is making a blobby line which does give the appearance of snow

I must remember to put snow on both sides of the roof. This is easily forgotten. I have certainly forgotten to show this on the drawing. Some will gather in the trough of the broach spire. Window ledges, tops of grave stones, buttresses, snow will cling to horizontal surfaces of these. The ground level must look uneven as snow piles up the wall of the church

I usually like to paint snow-covered buildings as though some slight thaw has taken place, so that the ridge-tiles and part of the roof show through. This makes a bit more interest and relief from all that white.

The church stands on high ground. I have exaggerated the gradient in the drawing, slightly, to increase the interest. Shadows, when I put them in, will tell the eye where the ground lies, and pick out the ups and downs. Also I have put a couple of houses in the background, which are dropped down behind the slope.

I usually put in some frozen looking bushes and dead-looking grasses, strategically, so that hopefully they will indicate that the ground slopes down towards us

So, plenty to do. Best get on.

Snow Painting

Pyrford Parish Church

Using the charming little church of St.Nicholas at Pyrford, one of the Woking villages. To give an idea of the sort of effect I want to achieve, the following painting of Wanborough Barn near Farnham, was done from a photograph without snow, just adding snow from imagination. We don’t get enough snow, I am afraid, to get good snow scene shots to work from, so we will just have to adapt what we haveWanborough Barn near Farnham

Wanborough Barn near Farnham, with added snow

So that is the task to be tackled next. I need a snow scene for my next exhibition, as usually they sell quite well.

Just a word about St.Nicholas Church. It is an unspoiled but humble village church of the 12th century, retaining many of its original Norman features. Unexceptional apart from having a porch on both sides, which is unusual. It is built from local materials, naturally, using pudding stone and clunch, which is the hard form of the local chalk, used quite a lot for building materials in the area. In some parts of the church, not on the shot I have shown, the walls have been stuccoed over, which was done to give the appearance of stone

That should keep me busy for a little while. I will publish the working sketch just out of interest, just to see which way we go with this

Different people have asked to see photographs of my workspace. I have been taking some pictures and will run a post on that. Not very impressive as we live in a 19th century cottage, and space is at a premium, but it is always surprising how well you can operate from a little corner. Good lighting is essential, and the rather expensive lighting I use, I actually prefer to daylight

I will go into detail on that at a later date

Istanbul:our condolences

DSCF2491

Our deepest sympathies to the people of Istanbul, for yet another terrorist outrage in your country today

We were there on this spot in October, so makes it feel closer. Crazy misguided people who can’t be reasoned with are a threat to us all. Somehow they must not win

Such a lovely city, Istanbul. People should keep visiting